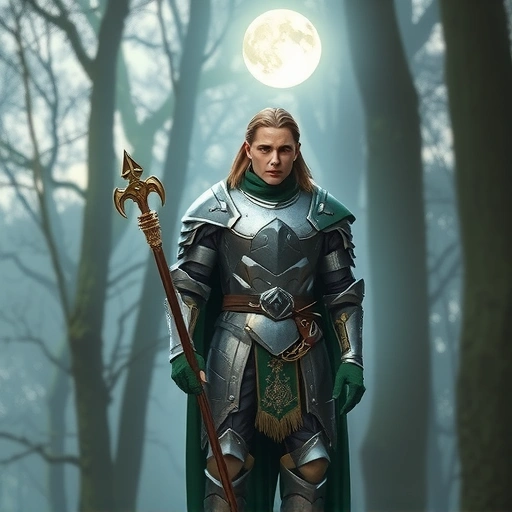
This guide covers the basics: where your subject is facing, how close the camera is, and the camera’s height and perspective. We’ll look at simple ways to ask for these shots in your prompts.
Control Where Your Subject Faces
You can direct Midjourney to show your character from different sides. This is called subject orientation.
Front Shot: The character looks directly at the camera. This is good for showing faces and feelings. Use “front shot”. It works well for tall images. For wider images, add detail like “she is looking directly at the camera”.
Front Shot: The character looks directly at the camera. This is good for showing faces and feelings. Use “front shot”. It works well for tall images. For wider images, add detail like “she is looking directly at the camera”.
Side or Side Profile: The character faces sideways, showing their outline. Use “side shot” or “side profile shot”. This is often easy for Midjourney to understand for different image shapes.
Side or Side Profile: The character faces sideways, showing their outline. Use “side shot” or “side profile shot”. This is often easy for Midjourney to understand for different image shapes.
Backshot or Back View: The camera is behind the character. This hides their face but shows the scene around them. Use “backshot” or “back view”.
Backshot or Back View: The camera is behind the character. This hides their face but shows the scene around them. Use “backshot” or “back view”.
3/4 View: The character is angled between facing forward and sideways. This shows both some face and some body shape. Use “3/4 shot”. This can be harder to get right consistently compared to other angles.
3/4 View: The character is angled between facing forward and sideways. This shows both some face and some body shape. Use “3/4 shot”. This can be harder to get right consistently compared to other angles.
Putting these terms at the start of your prompt often works best. If you are making illustrations, sometimes “view” works better than “shot.”
Set Your Camera Distance
Controlling the camera’s distance changes how much of the subject you see. It frames your character tightly or loosely.
Extreme Close-up: Fills the frame with just part of the face, often from the eyebrows down to the nose. Use “extreme closeup”. This creates a strong feeling.
Extreme Close-up: Fills the frame with just part of the face, often from the eyebrows down to the nose. Use “extreme closeup”. This creates a strong feeling.
Close-up: Shows the character’s head or face. Use “close-up shot” or “close-up portrait shot”. This focuses on facial feelings.
Close-up: Shows the character’s head or face. Use “close-up shot” or “close-up portrait shot”. This focuses on facial feelings.
Medium Shot: Shows the character from the waist up. Use “medium shot”. This gives more scene context but is often hard to prompt just using the term “medium shot”. Sometimes this gives a close-up face instead. Trying “2/3 body” or “2/3 full body” might help get the waist-up view.
Medium Shot: Shows the character from the waist up. Use “medium shot”. This gives more scene context but is often hard to prompt just using the term “medium shot”. Sometimes this gives a close-up face instead. Trying “2/3 body” or “2/3 full body” might help get the waist-up view.
Full Body Shot: Shows the character’s whole body. Use “full body shot”. This shows even more of the background. It’s often easier with tall image shapes. Being more descriptive about what the character wears or the scene around them can help Midjourney place the camera further away.
Full Body Shot: Shows the character’s whole body. Use “full body shot”. This shows even more of the background. It’s often easier with tall image shapes. Being more descriptive about what the character wears or the scene around them can help Midjourney place the camera further away.
Setting the right distance can be tricky in Midjourney. Asking for more of the character is often easier with tall image shapes. A good tactic is to get the orientation and angle first, then use Midjourney’s zoom out or pan features to get the distance you want.
Getting consistent character shots at different distances can be a challenge. A tool designed to help with Midjourney automation might make this process smoother by managing different prompts and variations for you.
Choose Your Camera Angle and Perspective
Beyond where the subject faces and how close the camera is, you can also change the camera’s height and angle.
Low Angle: The camera looks up at the subject. Use “low angle shot”. This can make the subject look bigger and strong. It often works well for both tall and wide images.
Low Angle: The camera looks up at the subject. Use “low angle shot”. This can make the subject look bigger and strong. It often works well for both tall and wide images.
Wide Angle: Use “wide angle”. This term can depend on the context of your prompt. If you include a scene like a room, you might get a wider view. If you just ask for a person, you might get a medium close-up but with a wide-angle lens effect.
Wide Angle: Use “wide angle”. This term can depend on the context of your prompt. If you include a scene like a room, you might get a wider view. If you just ask for a person, you might get a medium close-up but with a wide-angle lens effect.
Fisheye: Use “fisheye”. This gives a very wide, distorted view with bent edges, like looking through a peephole. Midjourney handles this effect well.
Fisheye: Use “fisheye”. This gives a very wide, distorted view with bent edges, like looking through a peephole. Midjourney handles this effect well.
High Angle: The camera looks down at the subject. Use “high angle shot”. This can make the subject look smaller or less important. Sometimes Midjourney might give an overhead shot instead. Phrases like “medium high angle shot” might help, but getting a clear angle that is not directly overhead can be difficult.
High Angle: The camera looks down at the subject. Use “high angle shot”. This can make the subject look smaller or less important. Sometimes Midjourney might give an overhead shot instead. Phrases like “medium high angle shot” might help, but getting a clear angle that is not directly overhead can be difficult.
Drone Shot: The camera is high above, looking down, showing a large area. Use “drone shot”, “wide angle drone shot”, or “extreme long drone shot”. This gives an aerial view.
Drone Shot: The camera is high above, looking down, showing a large area. Use “drone shot”, “wide angle drone shot”, or “extreme long drone shot”. This gives an aerial view.
Midjourney often defaults to eye level. Adding these terms pushes the camera to different heights or angles.
Putting It Together
You can combine these techniques. Try a “low angle full body shot” or an “extreme closeup side profile”. Experiment to see what works.
If you are creating images of the same character, Midjourney’s character reference feature helps keep the character consistent across different shots. Use a character reference image that has the orientation you want, or use multiple reference images.
Learning these shot types helps you build visual stories with your images. While this guide focused on characters, you can use many of these terms for landscapes or objects too.
Remember that zooming out or panning after generating an image can also help you get the shot distance and framing you want, especially full body shots.
Creating a series of precise shots for a project can be time-consuming. Consider exploring a tool like the
Practice using these terms in your prompts. See how Midjourney responds. You’ll get better at telling it what you want for your images.
Do This Locally with Logen
Skip the subscription. Generate images like these on your own GPU — private, unlimited, no cloud dependency.
Midjourney vs Logen
| Feature | Midjourney | Logen |
|---|---|---|
| Cost | $10-60/mo | Free |
| Privacy | Cloud (images stored) | 100% local |
| Generations | Limited by plan | Unlimited |
| Internet Required | Always | No |
| Custom Models | No | Yes (any ComfyUI model) |
| GPU Required | No (cloud) | Yes (local) |
| Ease of Use | Discord bot | Desktop app |